Amazon S3 is a cloud-based object storage service that lets businesses securely store their data at scale.
Setting up the S3 source
- Log into your RudderStack dashboard.
- From the left panel, go to Directory > Sources > Reverse ETL. Then, select Amazon S3.
- Assign a name and click Continue.
Connection credentials
Configure the following settings to authenticate RudderStack to access your S3 account:
- Connection Mode: RudderStack provides the following options to connect to S3:
- Cross-Account Role (recommended): This option lets you connect to S3 through an IAM access role. To do so, you need to first create an IAM role for RudderStack with the required permissions to access your S3 account. Refer to the Creating the RudderStack IAM Role for S3 section below for the detailed steps.
- Access Key: This option lets you connect to S3 using your AWS access key ID and secret access key.
- Account Name: Specify a name that will be used to identify the connection account.
- Role ARN: If you select the Cross-Account Role (recommended) connection mode, specify the ARN after creating the RudderStack IAM role.
- AWS Access Key ID: If you select the Access Key connection mode for authenticating RudderStack, specify your AWS access key ID. For more information on obtaining your access key ID and secret access key, refer to the FAQ section below.
- AWS Secret Access Key: Enter the corresponding secret access key.
S3 permissions
The minimum S3 permissions that need to be attached to IAM role or the access keys (depending on your connection method) are listed below:
"Action": [ "s3:GetObject", "s3:ListBucket"],Schedule settings
Specify the Schedule Settings to schedule the data syncs from your S3 source.
Connecting to a destination
Once you successfully set up your S3 source, you can connect it to your preferred destination by clicking the Add Destination button, as shown:

Specifying the data to import
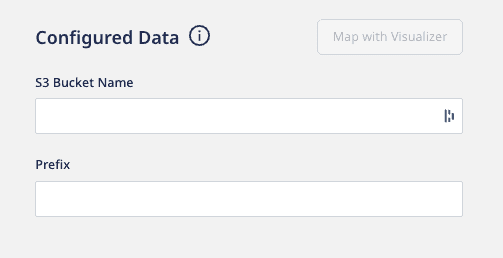
While configuring the destination, specify the following bucket configuration settings needed for RudderStack to import the data and sync it to the connected destination:
- S3 Bucket Name: Enter the name of the S3 bucket.
- Prefix: Prefix refers to the path within your S3 bucket from where RudderStack will import the data. For example, if Prefix is set to
RUDDER, then RudderStack will import the data stored in the location<your_s3_bucket>/RUDDER.
null value (empty strings are allowed) for any column. It helps RudderStack to determine the correct schema of the file.- Choose user identifier: Choose a user identifier for
user_idand/oranonymous_idfrom the dropdown.
Once you specify the above settings, you will be able to preview a snippet of your data, as shown below:
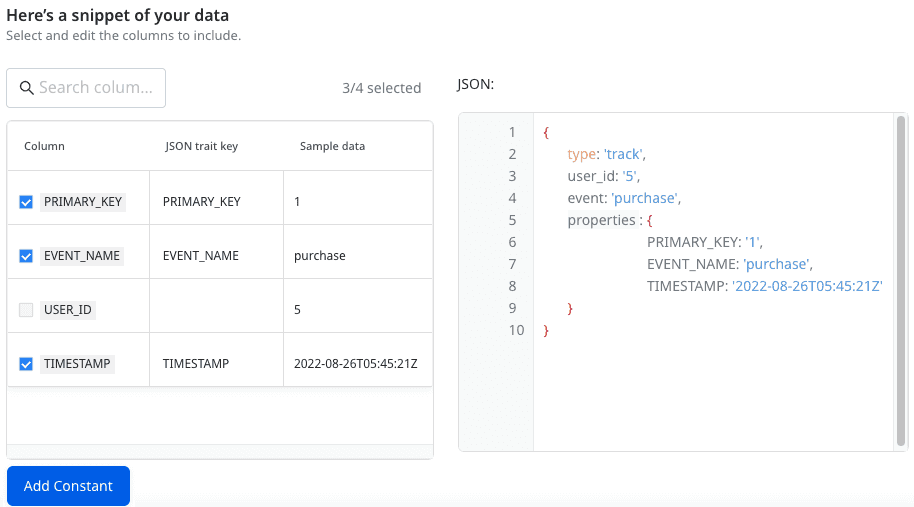
Here, you can select all or only specific columns of your choice, search the columns by a keyword, and also edit the JSON Trait Key. You can also preview the resulting JSON on the right.
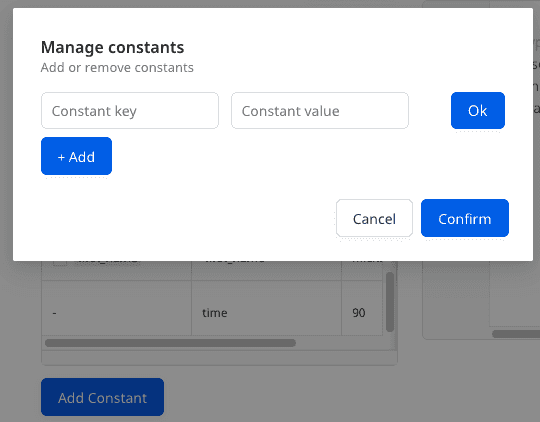
- Add Constant: You can use this option to add a constant key-value pair which is always sent in the JSON payload, as shown:
Updating an existing configuration
- Go to the Schema tab of your configured source and click Update.
- Update your column selection.
- Finally, click the Save button.
Creating the RudderStack IAM role
Follow the steps in this section to create a RudderStack IAM role and obtain the role ARN.
Creating the policy
To create a managed policy defining the permissions for the RudderStack IAM role, follow these steps:
- Sign in to your AWS Management Console and open the IAM console.
- In the left navigation pane, click Policies followed by Create policy.
- In the JSON tab, paste the following policy:
{ "Version": "2012-10-17", "Statement": [{ "Effect": "Allow", "Action": "s3:ListAllMyBuckets", "Resource": "*" }, { "Effect": "Allow", "Action": [ "s3:GetObject", "s3:ListBucket" ], "Resource": "*" } ]}- Click Review policy. On the Review page, enter
read-write-app-bucket.
Creating the IAM role
- In the left navigation pane, click Roles and go to Create role.
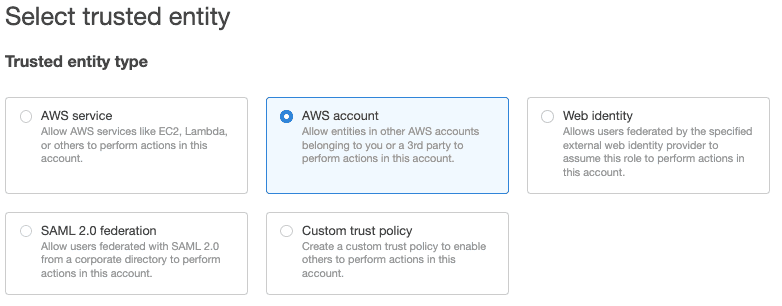
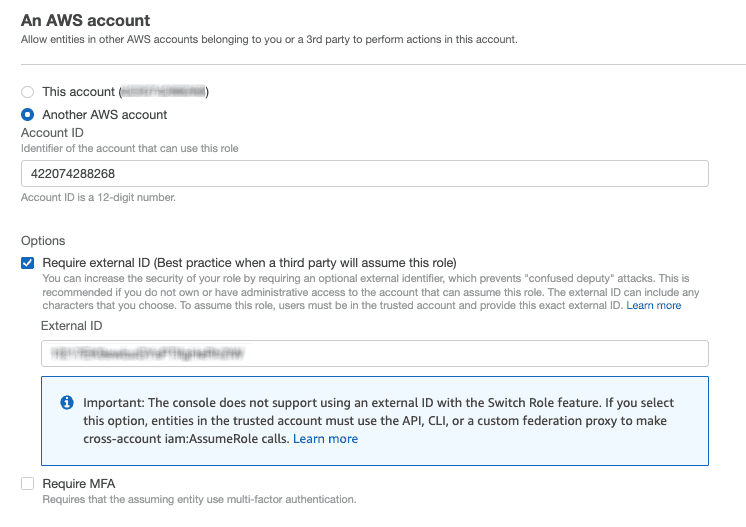
- Under Trusted entity type, select AWS account, as shown:
- Select Another AWS account and under Account ID, enter
422074288268, the account ID associated with RudderStack. - Under Options check Require external ID and enter your workspace ID as the External ID.
- Review all the settings carefully and click Next to proceed.
- In the Permissions window, select the check box next to the policy you created in the Creating the policy section above.
- Review all the settings carefully and click Next to proceed.
- Enter a unique name for your role. Note that this name is case-insensitive. For example, you cannot create a role named
RUDDERSTACKifrudderstackalready exists.
- Optional: Enter the description for this role.
- Click Create role to complete the setup.
- Finally, copy the ARN of this newly created role and paste it in the Role ARN field in the dashboard settings.
FAQ
Where can I obtain the AWS Access Key ID and the AWS Secret Access Key?
- Sign into your AWS Management Console as the root user.
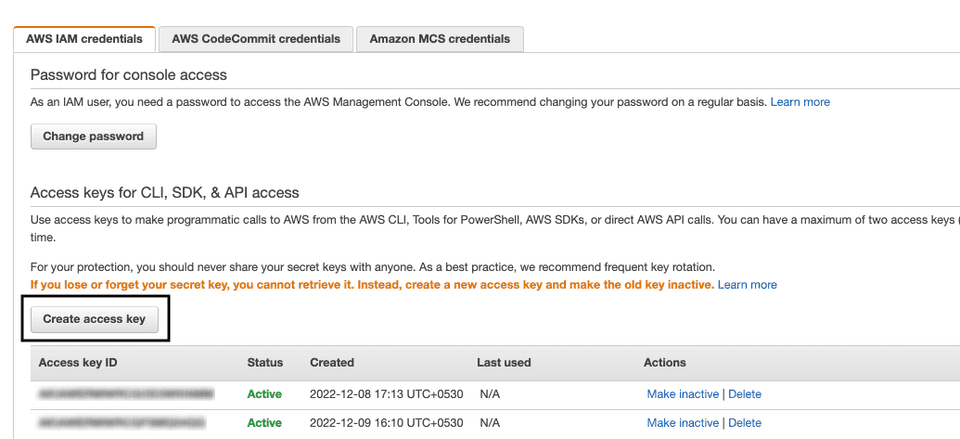
- From the upper right corner, click your account and go to Security Credentials. You can find your access key ID listed here. You can also create a new access key by clicking the Create access key button, as shown:
For more information on these AWS credentials, refer to the AWS documentation.
Contact us
For more information on the topics covered on this page, email us or start a conversation in our Slack community.